Showing posts with label sewing. Show all posts

Thursday, September 14, 2023

Chunking My Sewing

Knitting is linear. One stitch follow another, row follows row and piece follows piece until the whole is constructed. Crochet is linear, tatting, bobbin lace and weaving are all linear.

Sewing doesn’t have to be.


The patterns I have seen are mostly linear. They employ some efficiencies such as interfacing all pieces that need it and stay stitching all the parts needing it but otherwise, step follows step as the garment is constructed piece by piece.


I understand this. It works well for the novice to see the item constructed one piece at a time with instructions including directions to repeat (if needed).


My brain, however, doesn’t work that way. When it comes to constructing a garment, I jump ahead in the instructions (sometimes to my detriment) to see what can be done at the same time. Why do I do this? It saves time and energy. 


Instead of sewing a piece and then jumping up to press the seam and then returning to my machine to do the next piece, I sew in chunks. I sew all independent seams at once and then press them appropriately. Then on to the next batch.


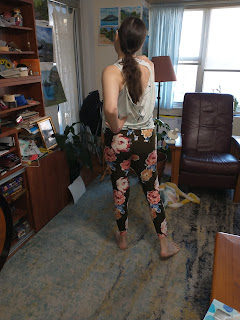
For example, this week I found myself cloning a pair of cargo pants for my son. To date I have tried two published patterns and found them wanting, One came only with a 4 hour long video which showed each and every step using hand signals to indicate what was happening (no verbal or written instruction at all) while the other was fine but just not to my son’s liking in terms of the pockets.


I thought about adapting the second pattern but found myself changing out so many parts that I finally decided to clone what he has and likes (and which is no longer available in stores or online).


I deconstructed the pants, traced out pattern pieces from the parts (added a little length) and set about reconstructing them from new fabric.


From the start I kept a list of what I wanted to do when. Initially I wrote out the list for the first three steps and later, listed the steps as I went or even, after I finished them.


The steps went something like this: 


0: Interface:

Fly pieces

Waist band

Pocket Flaps

Zipper guard


1: Serge edges:

Pockets

Top of backs and fronts

Back yoke 


1a: Serge together

Pocket flaps (rs facing)

Zipper guard

Waistband

2: Press:

Top and bottom edges of pockets turned under 

Sides of all pockets

Pocket flaps (once turned right side out)

Zipper guard (once turned right side out)


3: Sew:

Top stitch:

Pocket openings: front, back, cargo

Pocket flaps


Join front and back waistband


And sew on …


By chunking my sewing into actions instead of garment pieces I am somewhat more efficient. Yes, I know that constructing garments by hand is not seen as efficient but I hate clothes shopping so yes, making it myself is both more efficient and more pleasant.


Do I sew step by step at times? Almost always when following a pattern for the first time. At the very least I have learned to read a pattern thoroughly before starting instead of jumping in feet first. After reading it I might choose to chunk a few steps but not until I first note down what can be chunked. 


Just like the act of constructing a garment, either by sewing or knitting, feeds my soul and makes me happy, creating small (or large) efficiencies in the process also feeds my soul. To me, chunking is simplifying, And simplifying is good.


My son will periodically share how he has streamlined various processes at work. What had taken the previous employee hours takes him far less time. Why? Because, as he relates, he takes a small bit of time to figure out how to save a much larger amount of time..


That is what chunking does for me. By taking a few minutes to sort out the pieces at the start of construction I save time later on by not going back and forth from sewing machine to ironing board to serger to ironing board to sewing machine and, instead, do the same but far fewer times (which also saves electricity and time by not having the iron cool down and heat up again).


Will this work for everyone? Nope. It won’t even work for me all of the time. But it does work for much of my sewing and has the added benefit of making me happy and that is what it is all about!


Cargo Pants before sewing

Pieces of fabric that will come together to become a single pair of cargo pants


Thursday, February 23, 2023

Paper Dolls!

 Back in November I got together with my childhood buddies, Annette and Allison. The three of us met as “first families” in Co-op City in the Bronx back in the early ‘70s. For 6 years we played together, walked to school together and had sleepovers. All the things that kids do (or at least did back then). Co-op City in its early years was a magical place for a little kid. 


We lived in the townhouses in section 2, Cooper Place. For those of you with no idea of what I am talking about, let me pause and give an overview.


Co-op City is one of many housing projects spread throughout New York City. Composed of 5 sections, there are townhouses with three bedroom duplexes and one bedroom garden apartments allowing for mixed generational living. The garden apartments held older couples while the duplexes housed families. There were also single core towers, double core chevron shaped buildings and triple core buildings similar to the building that I currently live in.


Much like my current home in the Penn South Co-op, there is a lot of green space and tons of places for kids to play. Our earliest playspace was the courtyard that separated our banks of townhouses. To get to the courtyard all we had to do was leave our townhouse. That’s it. No cars allowed. The Cooper Place courtyard is where I learned to play hopscotch, jump rope and ride a bike. We walked on stilts, used pogo sticks and, in the winter, had snowball fights. We could walk to school without ever crossing a street.


My friends and I started kindergarten in the community center and were the first, first graders in the spanking new educational complex.


We endured the experiment that was the open classroom and one of us even graduated from the high school, making her a member of the first set of graduates to go all the way through that set of schools. 


Over the years we drifted apart. I was the first to move as my family broke apart and was later reassembled in a different, healthier form. Next, one  went another off to the suburbs. The last of us remained, left as an adult and then returned to her childhood home as her parents aged in place.


During our breakfast outing back in November, we shared our memories of a childhood viewed through three different lenses. It was fascinating to see what the others remembered and what I forgot. 


Fast forward a few weeks and you find me trying to figure out what a retirement wardrobe should look like. I’m watching youtubes videos on capsule wardrobes and listening to podcasts on “finding your style.” Then I wander over to the Seamwork website and discover their “Design Your Wardrobe” course. No, I haven’t taken it but I have scrolled through the course materials. And what did I find? Paper dolls! O.k., not really but sort of. There are line drawings of different adult silhouettes and you can match up line drawings of the sewing patterns to go with your silhouette. Look like paper dolls to me!, 


(not the Seamwork silhouettes)

That immediately sent me down memory lane, playing with and making our own paper dolls and paper doll clothing. Happy memories of a time when our responsibilities were mostly limited to doing homework and practicing our instruments. When free time was spent playing in the courtyard or riding our bikes or playing board games. A simpler time that we can never return to but that will always put a small smile on our faces when we think of it.


Here’s to simple times and the memories they bring.


Who wants to play paper dolls with me?!


Wednesday, February 08, 2023

Retired!

 New Beginnings


It’s official, I’m retired.


It has been a week now and it is still sinking in. All of a sudden I have time. I can just … be.


Really this is the first time in my life where I was not expected to be constantly busy. To be productive, to live according to someone else’s timeline.


There are a lot of things that I want to do but the urgency to squeeze them into specific time slots isn’t there.


This week I had to clean off the bed in my craft room and change the sheets. (Our daughter is coming into town this weekend and staying with us.)  It took me almost a week but it is done. 


Over the last few months the bed has become my de facto desk. I have a lap desk set up on it with my computer on top so that when I sew I can easily consult the pdf instructions without having the computer eat up my limited sewing space. Since the bed is a desk, that means that the bills and other papers that I didn’t have time to file and sort wound up intermingled with sewing patterns and scraps of fabric because, in addition to being a desk, the bed is also a great place to put projects-in-progress.  And my feet. (I’m currently sitting in my desk chair with my feet up on the bed and the lap desk on, well, my lap.) During the morning hours it is a lovely place to sit and bask in the sun. And, since I’m retired, I can do just that.


Now I still have a lot of other things to do in this room and in almost all of the other rooms. That said, I can do them when I wish. Slowly, quickly or, should I so choose, not at all. The last one is unlikely but it is an option.


In the last week I have slowly and intentionally practiced with my new serger/coverstitch machine. For those not in the know, it is a machine, a little bigger than my sewing machine, that allows me to sew with much more professional looking seams and hems. The new machine is now occupying my sewing table and the sewing machine is on the floor waiting for me to clear off my desk (not the bed-desk but my actual desk-desk) so that  I can use them both on the same project without having to switch them around.  The desk desk is currently occupied mainly with my daughter’s violin and another lap desk (they multiplied during lockdown.).


My new machine was my retirement gift to myself. So far I have made 2 pairs of workout tights, two pairs of flare leggings, two double layered hooded blankets and a dress. I have also used it to repair a couple of items where seams had popped open. So for someone not doing much this week, I’ve actually done quite a bit.


Past projects have either been rushed through in a weekend or taken a couple of weekends to complete due to time constraints, Yes, the blankets were over a month overdue but I am hoping that, with time on my side (and the presumed ability to actually decide on the fabrics) that I will be on time for the birthdays next year. (Sorry L & L!)


What else have I been up to this first week of retirement? Well I worked out 6 out of 7 days, 5 barre classes and a rowing class. All in the morning! No more late dinners! I also finished another project which has a looming deadline and made progress on some knitting. And finally, I took time to sit with a cup (or three) of tea and just read.


#noregrets


Sunday, January 30, 2022

Leggings: A Learning Journey


Eight Ten pair of leggings (workout style). (Pattern links at bottom of post)

That's how many I have made since my love affair with me-made workout gear began.

Sports Bra and leggings set in a blue-black fabric

With each pair I have gained valuable skills and confidence.

Sports bra and tights with a pink, blue, black abstract fabric.pattern

Some have provided valuable lessons.

Sports bra and leggings in black with hot pink accents

Yet others have shown me the risks of choosing colors on line while still knowing that I do not have the greatest color sense in the world.

Sports bra and leggings in a watery blue with pink pockets

And another two pair taught me that workout tights can also be skirts! (There are attached bike shorts under the skirt.)

Blue top and blue sports skirt with shorts underneath

And yet others have proven that it is difficult to know what a fabric will feel like when bought on line. (The pair below are not my faves when it comes to working out.)

Hunter green tights with abstract print on pockets and waistband


It was this pair (below) that convinced me that it was time to start learning how patterns are actually drafted.

Purple Corset top with black leggings printed with kracken tentacles

They look good and feel great (fantastic workout fabric)  but I have some issues with them. First off, they are a little to long and hence a bit baggy at the ankle. This was my fault as I went for the "tall" version of the pattern without reading carefully and looking for what height the regulars are drafted for. Turns out I am kind of in between the two. Figures.

Second, when working out, they gather in ways that I think might be a result of a fit that is not perfect, and while I am happy wearing "not perfect," I still want to get closer.
---
Several weeks ago I reunited with a a workout buddy who has problems getting workout gear that fits correctly. I took this as a challenge. Asking if she would be my test subject, I got some basic measurements and, using the pattern I'd purchased for the Kracken tights, gave it a couple of tries.

On the first attempt I over thought it and
used some basic knowledge gleaned from the Made to Measure leggings class to try to adjust the purchased pattern. The end result was too small. Then, comparing the basic measurements to the actual pattern I decided to make it up in the smallest size. Too big.

Finally, I decided to try actually drafting the pattern using the Made to Measure leggings class. Since I am still waiting for my friends measurements I decided to give them a go with my own.


Not too bad.

The fabric is not something I would choose for leggings -- it is a bit too thin and has a bit too much stretch (100% horizontal and 50% vertical) and, using the yoga waistband, they were way to big at my waist -- matching my actual measurements instead of being more compressive, something that does not work in this fabric even with a compressive lining. I took a dart in each side of the waistband and will give them the workout test this morning.

My next steps will include making them again in a more suitable fabric (the first attempt was meant to be just that, an attempt using left over fabric from another project (yes, I over ordered and got a pair of "mommy and me" dresses (for me and my adult daughter!) out of the fabric before making the leggings).

I also want to compare my drafted pattern to my purchased patterns and see how they compare. The ultimate goal is to use my personalized pattern to alter purchased patterns and learn how to make the correct alterations. 

Once again, a learning process.

Pattern Links:

First, Second and Third Attempts -- Inspire Tights

Pockets!  -- Spark Tights

Sports Skirt -- Rally Skirt

Kracken Tights -- Simpaticos


Kracken Fabric - Sew Dynamic Fabric

Sunday, January 23, 2022

Slowing Down

 Slowing Down


I have a hard time holding back when I get an idea I really want to try.

For example, last week’s post. Go back, read it, comment and then return. I’ll wait …


I want to do it. I want to try to start my own semi custom, small batch, sewing business.


Now! 


Friday I was *this* close to stopping at the Spandex House (yes, it is a real place) and getting fabric for a sample first make.


Fortunately I got distracted and went home instead.


I need to slow down. I know that I do. My retirement plans are still up in the air and things at work are changing rapidly due to our new Mayor and Chancellor.


Also, I need to build my skills. I’ve only been at this clothing sewing thing for about a year and I know I still have a lot to learn. Yesterday, for example, I finally managed several good hems with a twin needle. (You know, the double line of stitching on the hem of your tee shirt – that. It’s not as easy as it looks.) I used some cool Kracken fabric from Sew Dynamic to make tee shirts for Mike and Natan and tried the twin needle out on them. Not perfect but not bad either.


Lessons learned from these shirts: 1. I need a little more than a yard of fabric to make short sleeve tees for each of my guys. I thought I had enough for Natan’s sleeves and discovered, after I had cut them and was ready to attach, that one was missing the top part. I improvised a fix and moved on. Mike’s shirt has contrasting sleeves and neck band. 2. I need more practice on twin stitching the neck band down. 3. I need to check each piece for issues before I sit down to sew it up - turns out one of Natan’s sleeve was missing its top. I sewed another piece of fabric on and made it work. Now I have ideas for color blocking sleeves!


In addition to needing time to build skills, I have several projects that I have fabric for and need to make up. These include, but are not limit to, a long black dress for Batya to wear for performances (Riverside Orchestra), multiple camisoles for me from the left over fabric from the quartet of tee shirts I made for Natan a few weeks ago and … pillow cases.


For the master bedroom we own two sets of bed clothes. That translates to two fitted sheets, two duvet covers and a passel of mismatched pillow cases. When one sheet wears out I replace it with the least expensive, same fabric content, option I can find on Amazon. That means that my bed is a mixture of different colors. No, I do not care if everything matches.


What I do care about is the fiber content. Many years ago I bought a set of linen sheets on sale. I never looked back.


So, when one of Mike’s pillow cases wore out last week, I decided it was time to make my own. We went to Gray Line Linen and purchased enough fabric to make a few pillow cases. In a color which neither clashes nor matches the rest of the bedding.


So, to summarize, I have plenty to keep me busy. And yet I am anxious to get started with the next part of my journey through life.


I am going to do my best this week to focus on what I have now instead of what I think I want next. Next is still far away and I need to live in the here and now.


Let’s see what happens.


Post Script: Here are three of the five pillow cases! Now to cast on a sweater …


Sunday, November 14, 2021

Failure or Lesson?

 Failure or Lesson?


I frequently encounter the phrases “I could never do that,” “I would mess it up,” “what if I make a mistake,” “that looks hard,” and others of that ilk. I’m never quite sure what to say in response.


My journey through crafting has always been a matter of seeing something, saying (perhaps just to myself) “that looks interesting,” and then, maybe years later, trying it.


Over the years I have learned how to crochet, knit, cross stitch, make bobbin lace, tat, construct and paint a doll house, paint my apartment, garden on a balcony, program a school, drive, weave and replace various parts of my dishwasher (none electrical). I admit to leaving most plumbing and electrical tasks to  professionals.


I learned how to crochet from my mother (I think, I don’t actually remember being taught), to tat from my aunt, to drive from my father (and a driving school) and everything else is mostly self taught. 


I do not consider myself brilliant by any means. Rather, I see figuring out something new as just that. Figuring it out. Each new skill, whether professional or personal, is something that someone else has done and therefore doable by me. Notice that sports are not included. They are not a puzzle I wish to figure out.


Yes, there are some things I do not wish to become good at.


Each of the skills that I have acquired had a learning curve (literal curves in the case of driving). My proficiency in these skills has improved due to my willingness to fail or, in the case of driving, to not crash.


Case in point,  these leggings.


Dark green leggings with contrasting pockets


They look good on the surface but are, in my opinion, not what I was going for. The design and execution are pretty good but I made a bad choice in the fabric. It is far thinner than I like in my workout tights and I didn’t adjust for my height so they are shorter than I would like. I also don’t like the thread. Oh, and the fabric on the legs is wrong side out. Oops.


Are they a failure? No. Are they a lesson? Absolutely! This lesson sent me to my computer to  research knit fabric weights and terminology. 


Will I try again? Yup! I think I have found the same color in a heavier weight and will probably order it.


All of my skill acquisitions have a similar story. The sweaters knit early in my knitting career that were far too big for my kids. The cross stitch projects that look kind of wonky. The lace samples that certainly don’t look like the illustration in the book. Did I give up? Maybe. I can’t remember what I have tried and then dismissed as “not being for me.” Certainly I have pushed crafts aside only to come back to them later in life as they became more intriguing. My aunt will often suggest things that she has tried that I am not ready to play with yet. Sometimes I try them, sometimes I don’t.


In the realm of education we talk about wanting to nurture a love of learning, to create life long learners. That is how I view my not-so-perfect makes. They are part of my learning curve, a part of being someone who is willing to try and fail learn.


Friday, October 15, 2021

Starting

If the last post was about finishing then this post needs to be about starting. (The topic of continuing will be another post.)

While the first steps in production happened this weekend, the two project I just started have been months (years for one) in the planning process. When I embark on a project I might just get the idea, buy the supplies and then start immediately. Others start as a germ of an idea and then proceed slowly as I figure out the how, what and why of the project. (For the writing teachers out there, the who, where and so what are usually the initial driving factors.)

Some projects may go from start to finish in the course of a weekend (a hat, a pair of socks knit while traveling) others may take months or even years.

The sweater below started as a concept the day that my son accepted his offer to the University of Michigan. It took a year and a half to get it to a finished state. The knitting only took a month. The other 17 months were spent thinking about it. Swatching, ordering thinner yarn, swatching again, graphing the notes, figuring out what to do on the sleeves (there is a clef on the right sleeve and a stop mark on the left) until I finally had it figured out. Mostly. There was still a considerable amount of recalculating done on the fly as I knit.

Adult male wearing a blue sweater with the notes of the University of Michigan fight song knit on it in yellow.

Other projects start as fiber that "jumps" into my arms in a store or at a fiber festival or fabric that just calls out to be a dress or, an idea that I want to try because it seems intriguing.

Last weekend I started  two projects. One began as fiber just begging to be spun and the other started as an idea begging to be created.

First up, I started knitting a new wrap/scarf thing in a handspun merino silk blend from Lisa Souza. The fiber was purchased at the New York Sheep and Wool festival at least two years ago, probably 3 or 4, and spun within a year of purchase. It has been sitting on a shelf looking pretty for about 2 years. 

Skein of blue yarn on a table top swift.

Ball of Blue yarn

My second project is a pair of cargo pants. The idea of making cargo pants crept into my head shortly after I successfully made my second dress this spring. A member of my family is tall and thin and favors cargo pants and it is difficult to get them in a waist size that also fits his leg length.

There are not that many patterns out there that fit the bill so much time was spent searching on line until I found one that also came with a video tutorial. I found the pattern two months ago but it took me this long to find what I think is the right fabric. Saturday was spent piecing the pattern together and cutting it out. Sunday I cut the fabric and started sewing. Monday was spent sewing al day. I successfully completed the front with the zipper, two side pockets and one front pocket over the 3 day weekend.

Front page of pattern for men's cargo pants

Bolts of fabric in shades of brown and tan

Neither project was finished over the weekend. I expected to finish the pants some time over the week but didn't get much done. Between evening activities (hello Carnegie Hall!) and this weekend's trip to the New York Sheep and Wool festival (hello Rhinebeck!)  these may be three weekends in the making.

The scarf/wrap has been cast on but it will likely take a month or two to complete. But then the satisfaction is in the process -- starting and finishing are just two of the steps.

#sewing #productivefidgeting #knitting #cargopants

Saturday, October 02, 2021

Finishing

I like to finish what I start. When I talk to other knitters I often hear that they have lots of unfinished projects. Unsewn sweaters, wraps with ends that need hiding, and tons of single socks. That's not really me. Yes, I have unfinished projects -- at least 2 cross stitches -- but as a general rule I tend to eventually finish what I start. Something about hiding ends and sewing the pieces of a project together is deeply satisfying. Even more so when I have made the fabric or yarn myself.

Right now, actively in progress (as opposed to those cross stitch projects), I have: a pair of socks (still working on the first sock), hand spun yarn that needs to be plied (at least 2 different types), a scarf being knit out of my hand spun and masks that are in their initial stages of the assembly line. 

Also in progress but nearing the finish line is my career as an education. 

Last week I wrote a blog post that I did not publish. I had to vent and I did so but, for now, am keeping it to myself. Maybe I'll put it up later as a part of a multi-part post on my time working for the New York City Department of Education. A time that is approaching its end.

Right now I am not sure when the end will arrive but it is pretty safe to say that I will be retiring in anywhere from 2 to 20 months. Monday may determine if I go on the earlier side. 

In the mean time, while I try to pretend that I am not stressing, I spent the day finishing some projects.


This dress was assembled several weeks ago but I had to wait until my daughter came for dinner to mark the hem. It is now hemmed and ready to wear to work next week. Pattern: Sydney from 5 out of 4 Patterns.


This top was purchased as a kit from Needle Sharp. I started it last weekend and finished it today. It is also slated to be worn to work next week. Pattern: Cielo from Closet Core Patterns

And then there are these ... some pretzel masks destined for Bar Method Noho and Darian. There are more in the pipe line because I may have gone a bit overboard when I purchased the fabric. 

Pattern: Fabric Masks from Twig and Tale with my own modifications.

I'm not sure what I will make tomorrow but you can be pretty sure that I will finish it.

#sewing #endings #maskup

Sunday, September 19, 2021

Masking Up

As a little kid I had dreams of being a seamstress. 

I would sew dresses out of old sheets and trim them with lace from old panties. I even posted a hand written sign in my bedroom window offering my sewing services.  I just loved to make things. That love of making has stayed with me my entire life and mask making fits right in. I find something seriously satisfying about sewing one batch of seams, then another and so on and so on, repeating step after step multiple times until a pile of masks is sitting in front of me. The actions are simple and yet the end product is actually fairly complex. 

Panel masks arranged in a wreath around a ball of blue yarn

In our home there was never a question about wearing masks. It was a given even if our Co-op hadn't required it in all public spaces. We weren't going out often, but when we did, we wore a mask. 

Over the last year or so I have spent a lot of time thinking about masks. What makes one style more wearable than another? Why do people have such different preferences?

Like my cousin over at Patterns from the Past, I have played with many styles and made personal judgements as to which ones are easiest to make (a basic pleated mask), which ones are best at keeping my glasses from fogging (pretty much anything with a good nose wire), what makes a good nose wire (I prefer 12 gauge aluminum cut to 14 inches with the ends bent under), which method is best for holding a mask on one's face (again, personal preference) and so on and so on. 

My answers to these questions are as varied as the questions themselves. 

It seems that masks, like shoes and underwear, are a personal matter. What works for you may not be what works for me. Yes, I am a proponent of nose wires but then I wear glasses and a mask that doesn't seal well over my nose means that I can't see  due to the fogging. My husband prefers that masks be held in place with elastic that goes around his head. My son is partial to a panel mask and my daughter needs softer ear bands, preferring ones that she crochets herself to the elastic that I use. Other folks are gung ho for the gold standard of non-medical masks, the KN-95, while yet others are partial to the disposable pleated paper mask. 

3-D and hybrid masks hanging from the spokes of a lazy kate

When masking was initially recommended I immediately thought "why buy when I can make?"  I could not stand the idea of paying for a disposable item when I could easily (or so I thought) make my own. The materials were already on hand and free DIY patterns were  plentiful. So, I dusted off my sewing machine (really, it was covered in dust!) and started making masks.

I had a fair amount of quilting cotton left over from my curtain making spree ten years ago. Google provided a basic pleated mask pattern and my daughter crocheted ear bands because elastic was in short supply.

Pleated Masks with crocheted ear bands

That first batch was a wonky looking lot but they covered our faces. Taking out a few for the family, the rest were donated to the soup kitchen at the church next door. I feel a little bad about those now but I was doing my best at the time.

Over the next several months I refined my techniques, found new "favorite" patterns and distributed my masks to family, friends and the staff and students at my sister's school. My repertoire expanded to four basic styles -- the "old school" pleated, the "hybrid" pleated, the "3-D" and the "panel" masks. My son and I prefer a panel mask with a zip tie inserted as a stiffener while my husband prefers the 3-D and hybrid masks. My daughter seems to mostly wear pleated and hybrid. In our family we all use nose wires now (we didn't originally) as we all wear glasses.

Hybrid, Halloween themed mask worn by the author.

I made some for the holidays because, if I'm going to wear a mask, I'm going to have fun with it!

One friend only wears KN-95s that she purchased in bulk and another mixes it up, moving between paper pleated, KN-95 and cloth -- heavy on the pink. Some folks like to coordinate masks with their outfits (ME!!!), wear seasonally themed masks (also me!) and others want their masks to be plain and unobtrusive. My son prefers plain colored fabrics because he finds a pattern distracting. He is, however, willing to wear colors of all hues. 

Child sized masks, half with fairies, half with trees

My mask making adventures reignited my love of sewing, particularly of production sewing. The rhythm and repetition of mass producing something is soothing and satisfying. It harks back to my childhood where I helped my father put out mailings for his firm. It's different from making a garment, satisfying in a different way. With a dress I am clothing one person. With masks I'm protecting my family, friends and community. And that is what drives so much of what I do in life, serving my community.

#sewing #productivefidgeting #maskmaking #masks 


Thursday, September 09, 2021

A Tale of Three Dresses


As I stated in my last post, my dive back into sewing was driven by one particular social media post. For some reason (known only to the algorithm designers) my mask adventures led to an ad in my feed from Rebecca Page. The ad photo was of the Classic Dress, a style that just screamed my name.

I love a summer dress with a flowy skirt and a fitted bodice and I had to have it. But I was afraid. I remembered the last dress I made, an ill fitting affair that I wore two or three times before retiring it and the slightly too tight nursing tops. But the ad kept popping up in my feed like it was daring me to give it a try. So I did.

I ordered the fabric on line from a highly recommended source and the website even matched the thread, lining, and zipper for me. This so excited me that I didn't realize that the vendor was located in Manhattan's Garment District -- a mere ten blocks away (and only two blocks from my office!).

The pattern was purchased and downloaded, I measured myself, assembled the pattern and started. The instructions were incredibly detailed and guided me through every step of the process from my first French seam to the final hem. Going slowly and carefully, reading and rereading the instructions, I put it all together. I sewed, I pressed and I trimmed. At one point I realized I was running out of matching thread and switched to using white on the inside seams, conserving the lilac for the hem.

And suddenly I was done!

Classic Dress in blue poplin, front view

Classic Dress with pockets, blue poplin

My first fitted garment in 20+ years! I was so excited -- and a little bummed that I was still working from home and had no one to kvell over it besides my family. Yes, I like to show off a little. 

There are imperfections. The zipper shows a bit because I didn't have the right zipper foot. The pockets (yes pockets!) have some puckers where they join the seam. And, it is a bit loose. But I made it and love it!

This time I went to the fabric store in person. I roamed the aisles stroking and poking the fabrics and finally settled on two. One was intended for a short sleeve dress, the other for another, more casual, sleeveless version.

Once again I cut and sewed and pressed, confidant that I knew what I was doing since this was my second go at the pattern -- and this time I had the correct zipper foot! I was even confident about the sleeves since I had eased many a sweater sleeve into place.

Yes, you can predict what happened. I got cocky and made newbie mistakes.

This fabric was thicker and had some stretch to it. I hadn't realized the stretch issue when I purchased it but did realize that it was thicker. What didn't occur to me was that the thicker fabric would give me some problems when it came time to put in the facing. You see, I had decided to forgo the lining this time and do a facing instead since the fabric was totally opaque.

Silly me.

Once again I followed the instructions to a fault, including hemming the facing. That was the fault. Since the fabric was on the thicker side this made the facing hem too bulky, a fact that bothers me every time I wear the dress (which I do!). No, I haven't fixed it but I probably should. Lesson learned: there are different ways to finish the edges of a facing and hemming may not be the best one.

I had, however, learned my lesson about the invisible zippers from the first dress, purchased the appropriate foot (and many others) and this zipper is indeed invisible. There are still issues where the zipper starts at my neck and the pockets are still a bit wonky where they meet the seams and the dress is still a bit loose despite my using the size corresponding to my measurements. But here it is!

Pink short sleeve dress


The second length of fabric that was meant to be another sleeveless dress was repurposed into matching skirts for my daughter and myself (the subject of another blog post due to the vast amount of learning that went with them).

Then I went on a bit of an adventure with workout gear and skirts. More about those in later posts.

Fast forward to July. I am now working from the office five days a week and am usually alone due to pandemic restrictions. Since returning to the office I have taken to roaming the nearby blocks to get some exercise and to check out the smaller fabric vendors. If I just want to get lost in the fabric, however, I still default to the larger, more well known store because, for me, a good browse is more comfortable in a larger space. I picked up some knits here, some voile there and had fun with my makes.

Then came the day of the fire drill. As happens in all office buildings we had an evacuation drill. Leaving the building is fairly quick but reentry can take up to an hour due elevator capacity. Knowing this, once I exited the building I decided to take an early lunch and headed over to the larger fabric store. Without any clear goal in mind I wandered the aisles and, while chatting on the phone with a friend, stumbled on the perfect poplin for a new dress. Then I found a fabulous light knit for a coordinating cardigan. I admit to crouching in the aisle stroking the knit for longer than was probably socially acceptable.

Using the lessons learned with the other two dresses and the garments in between, I pressed and cut and sewed. This version was lined with a thin, soft, cotton purchased from a hole-in-the wall shop near FIT (SUNY's Fashion Institute of Technology). The pockets are without wonkiness (yay!) but the zipper took three tries and I wound up doing some hand stitching to make it look more normal near the base. I just was not willing to redo the whole back yet a fourth time! I dare anyone to look that closely at the small of my back.

Classic Dress in red patterned fabric


This one fits perfectly! It seems (seams?) that when I actually use the recommended seam allowance the dress is just right -- almost. In between dresses I purchased a social media promoted gadget -- a magnetic seam allowance guide -- so I am no longer eyeballing my seams and they are now the correct width and much more regular. Love it!

As for the "almost" part of the fitting, I realized that the neck didn't lie quite right. This prompted me to go back to the first two dresses and realize that it doesn't lie right on them either. The problem is my body shape, not the pattern. So, I made a small box pleat in the center of the front neckline and now it lies better. Another lesson learned. On the next go I will try to actually alter the pattern piece to fix it since I want the dress to lie a little closer to my chest without the added pleat. Oh, and I also hemmed this one properly. The first two I just folded up the hem evenly around. This time I had my daughter mark the proper hem placement so that the back doesn't look shorter then the front. That lesson was learned from the mommy and me skirts. But that's another story!

#rpclassicdress, #rebeccapage, #rebeccapageba, #sponsored, #sewing, #skilllearning, #productionnotfidgeting, 

Wednesday, October 28, 2009

Ssssss ....

Ssssss .... I'm Sssssewing ...


Sssssee you after Halloween!

(And after Parent Teacher Conferencessssss ...)

Have a Ssssspectacular ... Ssssspooky ... and Sssssilly Sssssaturday!